| Enter the 'horizon' parameter.
David Griffiths, the author of the Lake applet has added a new 'horizon' parameter which makes it possible to overcome all the problems in laking difficult subjects. When the horizon parameter is used, instead of a reflection being created, the applet progressively distorts all the image below the level set by the horizon parameter. The effect is similar but superior in that it does not produce such a 'glassy' look. It's ideal for an image where a large body of water is in the original image.
The 'horizon' is set to the height of the farthest away water in the original image. An overlay is created containing all the non water bits below the 'horizon' level. Getting the overlay right can be a bit tricky. Here's the procedure we use:
- We set the background color to a color not used in the original - usually we use pure red, green or blue.
- we add about 200 pixels at the top of the original image (increase the canvas height).
- We then delete all the water area and select all that remains in our image editor.
- We move the selected area almost to the top of the image - within about 10 pixels.
- We save the image as a gif file with the transparency set to the background color
- Try out the applet If the overlay is too low move it higher in the overlay image, add more blank space at the bottom of the image by increasing the canvas size if necessary. If the overlay is too high move the non transparent part lower in the overlay image.
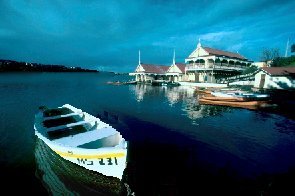
Once the overlay is in the correct position you may have to make a few adjustments to the source image to edit out parts of the image you don't want reflecting. In the example I've used I took out the top edge of the tender and post by cloning water over these parts. If you fail to do this your overlay will seem to ripple at the top edges - sometimes this can be useful e.g. for making a duck bob up and down in the water.
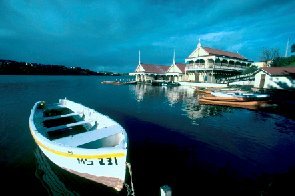
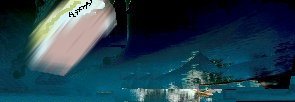
Here's the source and overlay images, the final result and the code which produced it:
| Source image |
Overlay image |
 |
|
|
<applet code="lake.class" id="lake" width="295" height="196">

<param name=image value="finalsource.jpg">

<param name="horizon" value="73">

<param name="overlay" value="finaloverlay.gif">

<img src="altimage.jpg" alt="The Tender" border=1 width=295 height=196>

</applet> |
|