Intermediate Tutorial - Using the David Griffiths Lake Applet
This tutorial assumes that you have already downloaded the latest version of David Griffiths Java Lake applet - you will need the file 'lake.class'. If you need this get it from here.
First step is to find a suitable picture to lake. Look for a .jpg file. You can use a .gif file, but it should not be animated or transparent.
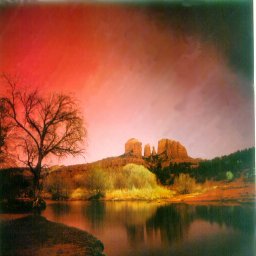
Here's the one which we are going to use. The file name is 'Arizona.jpg'
 |
|
||
The image has been cropped at the shoreline where we wish the reflection to start |
| <APPLET CODE=lake.class width=256 height=256> | Here you enter the width and height of the image. In this case, it's the same, but, it doesn't have to be. |
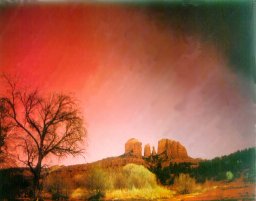
| <PARAM NAME=image VALUE="arizonabk.jpg"> | This is the name of the image that will be reflected in the lake. |
| <PARAM NAME=overlay VALUE="arizona.gif"> | This is the name of the image which appears in the foreground, this one is optional. This image must have a transparent background and must be saved as a .gif |
| <IMG SRC="Arizona.jpg" ALT="Aurora in Arizona" BORDER=1 HEIGHT=256 WIDTH=256> | This image will appear, if the browser used can not display java. |
| <PARAM NAME=rocking VALUE="false"> | This parameter is set to 'true' if you wish the image to rock as if you were in a boat. This parameter can be omitted if you don't want the image to rock. Example with the rocking set to 'true'. |
| <PARAM NAME=underwater VALUE="false"> | This parameter is set to true, if you wish to produce an under water picture where the lake is at the top of the image. This parameter may be omitted. Example with underwater set to 'true'. |
| <PARAM NAME=target VALUE="_self"> | This parameter allows you to produce the results in a particular frame. Normal frame syntax applies. The parameter may be omitted. |
| <PARAM NAME=hRef VALUE="http://www.jaydax.co.uk"> | This parameter is used to enter the URL which will be jumped to if the image is clicked on. This parameter is optional. |
| </APPLET> | The end of the applet code |
See a different version using the Dorian GrayII applet and the Anfy huerot applet
Now this is where something
may go wrong!
If you are using an older version of the applet's class
file - one named 'Lake.class', with an upper case
'L', then the foreground may not be in the right place.
If that's the case, then it's back to PaintShop
Pro to
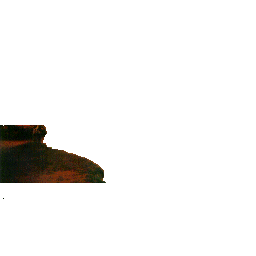
correct it by trial and error. Here's a copy of the foreground
image which works with the older versions of the class
file. Again, the green area is set to be transparent. If
you do have to do this, then remember that PaintShop
Pro
has
a keyboard shortcut where you can move a selected area
by holding down the Shift key and using the cursor
keys.

There,
simple wasn't it? Have fun, but if you run into problems,
feel free to email
us for help :)
For a VERY small fee, we'll even do
it for you!